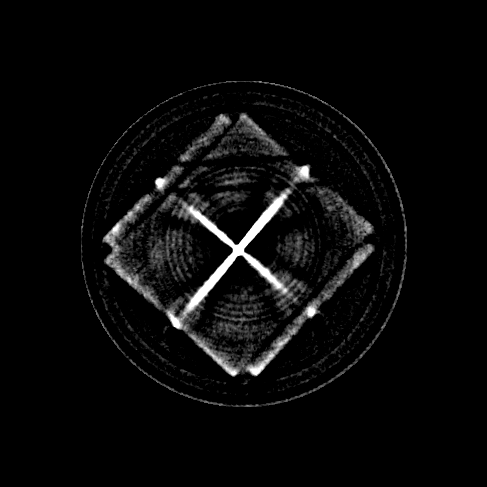
X-ray CT
It all began when a friend gave me a puzzle. And having struggled with it for well over 6 months, I had the bright idea of taking an x-ray of it. What followed was an adventure into x-ray CT scans with a side quest of camera de-bayering.
High voltage driver
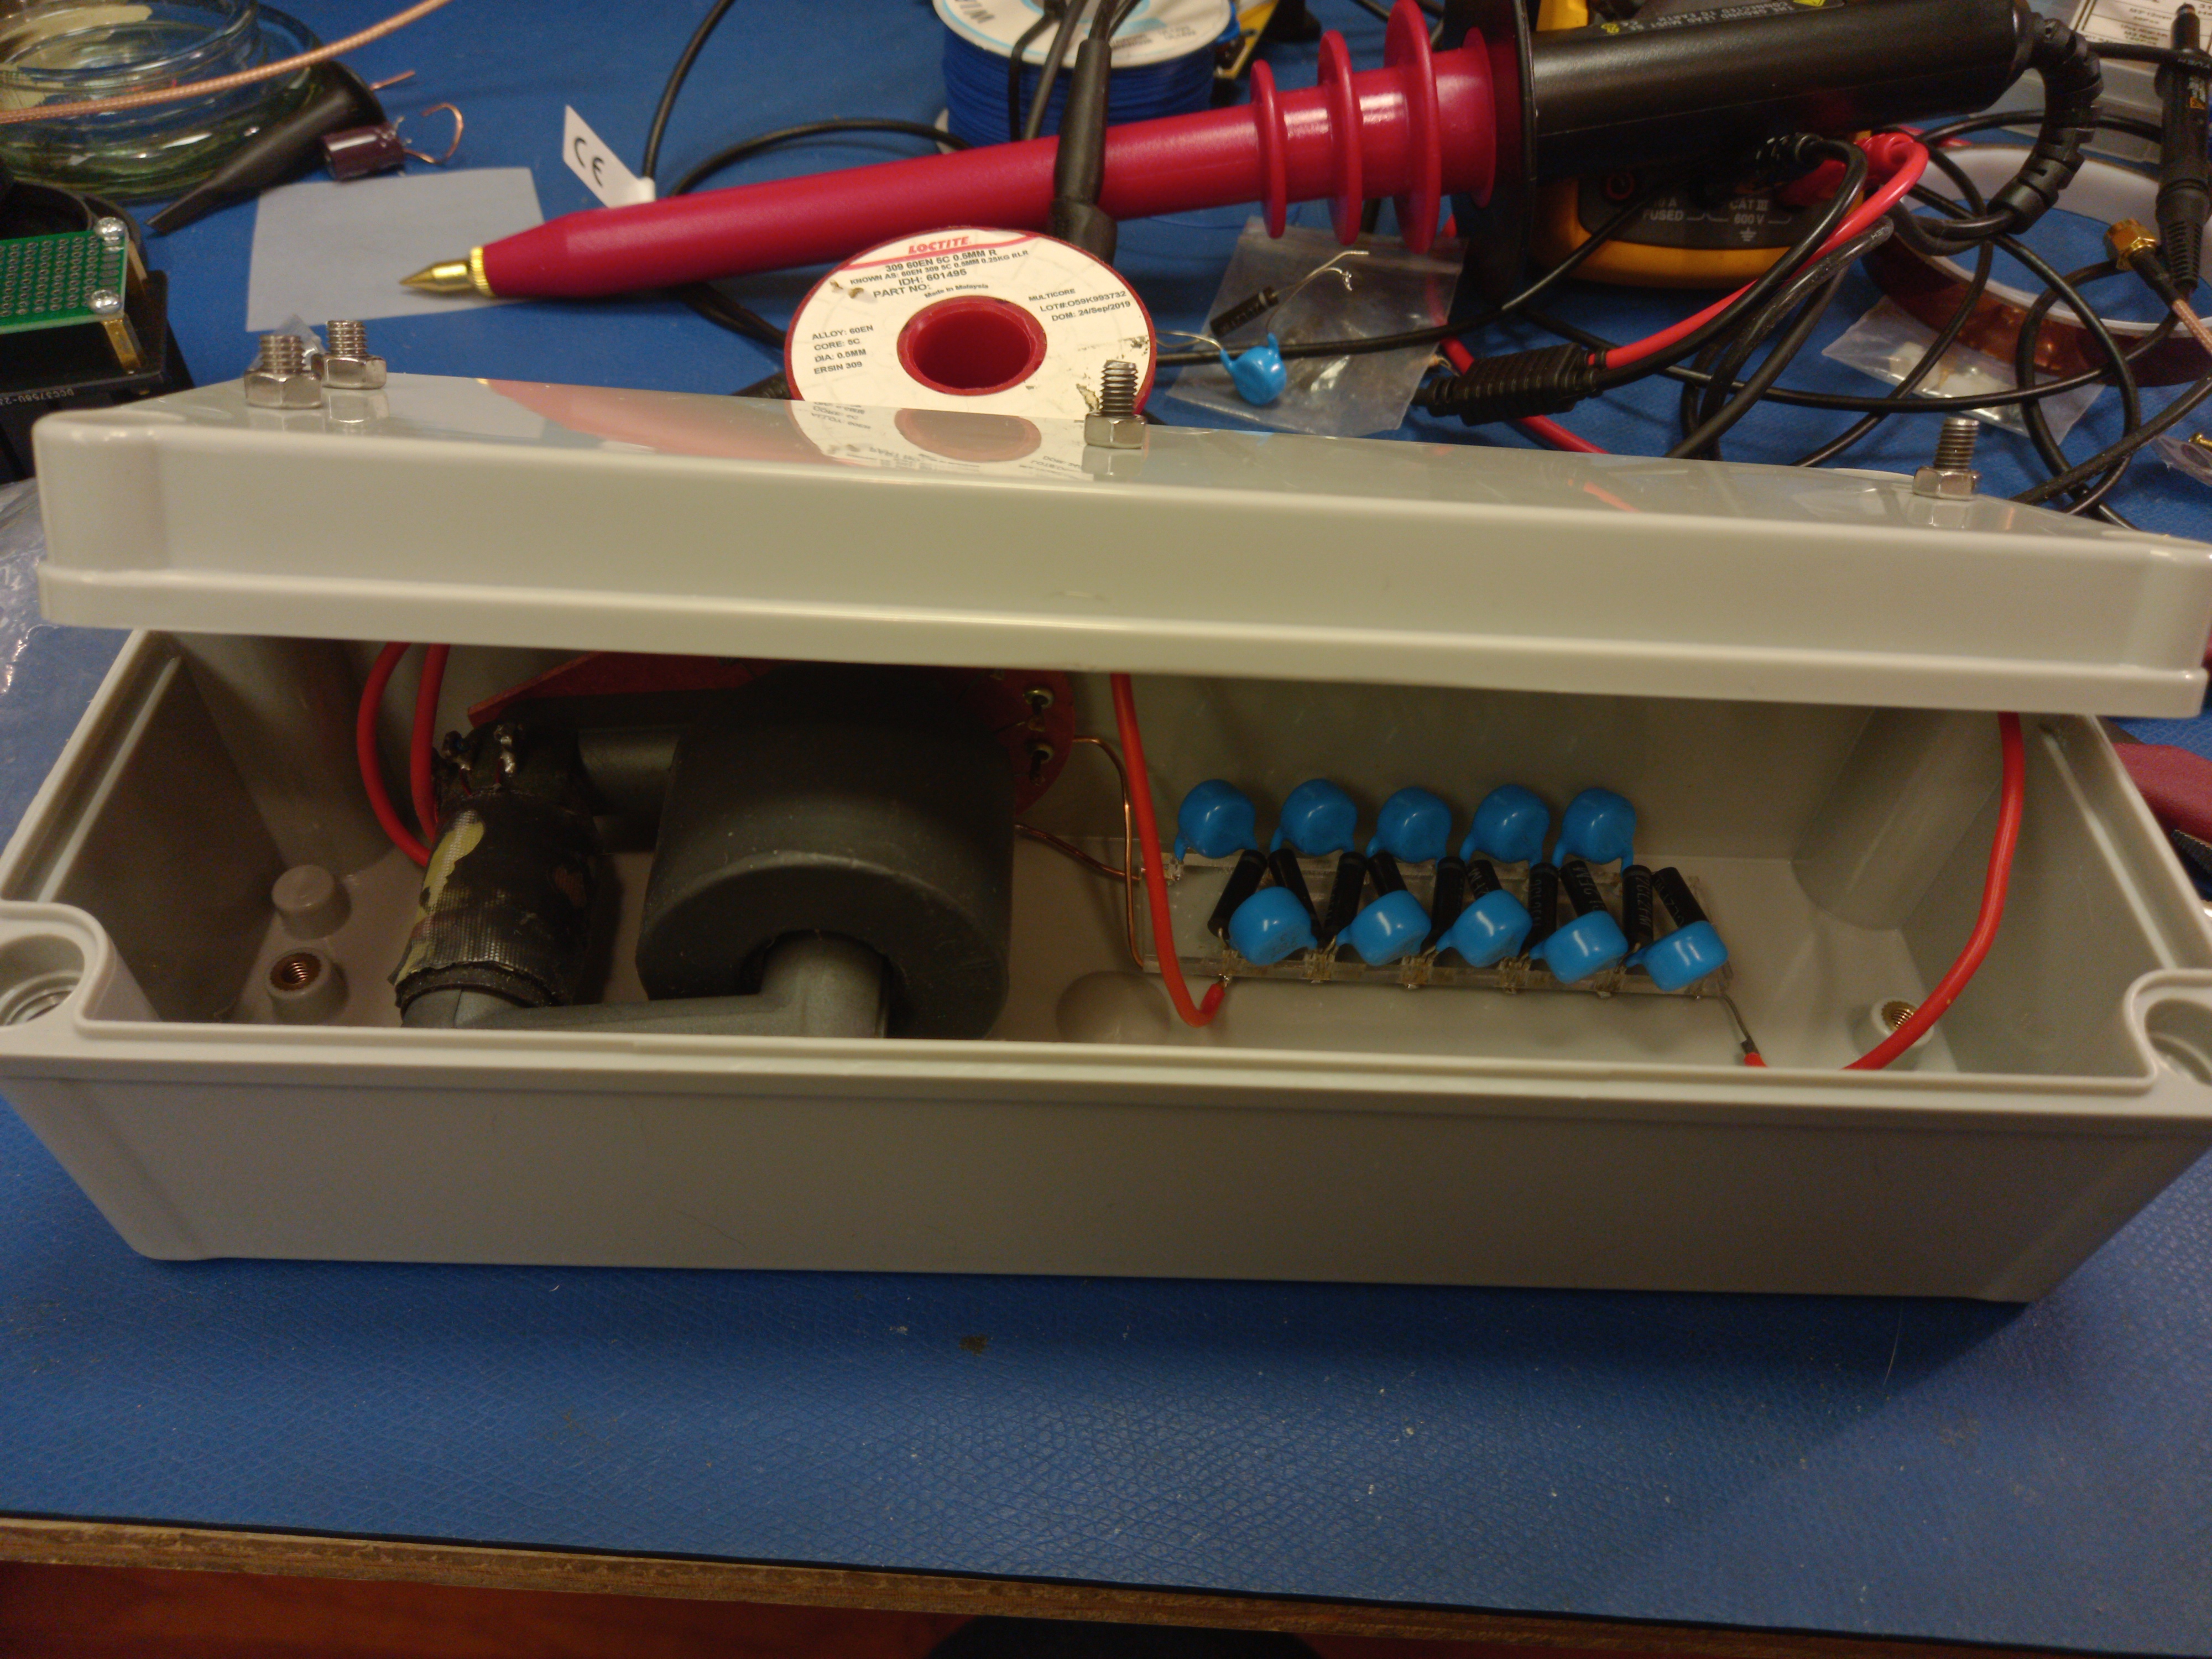
The high voltage source consists of an AC flyback transformer with a voltage multiplier submerged in mineral oil. I adapted a 555 timer module to have some quasi zero volt switching behaviour.
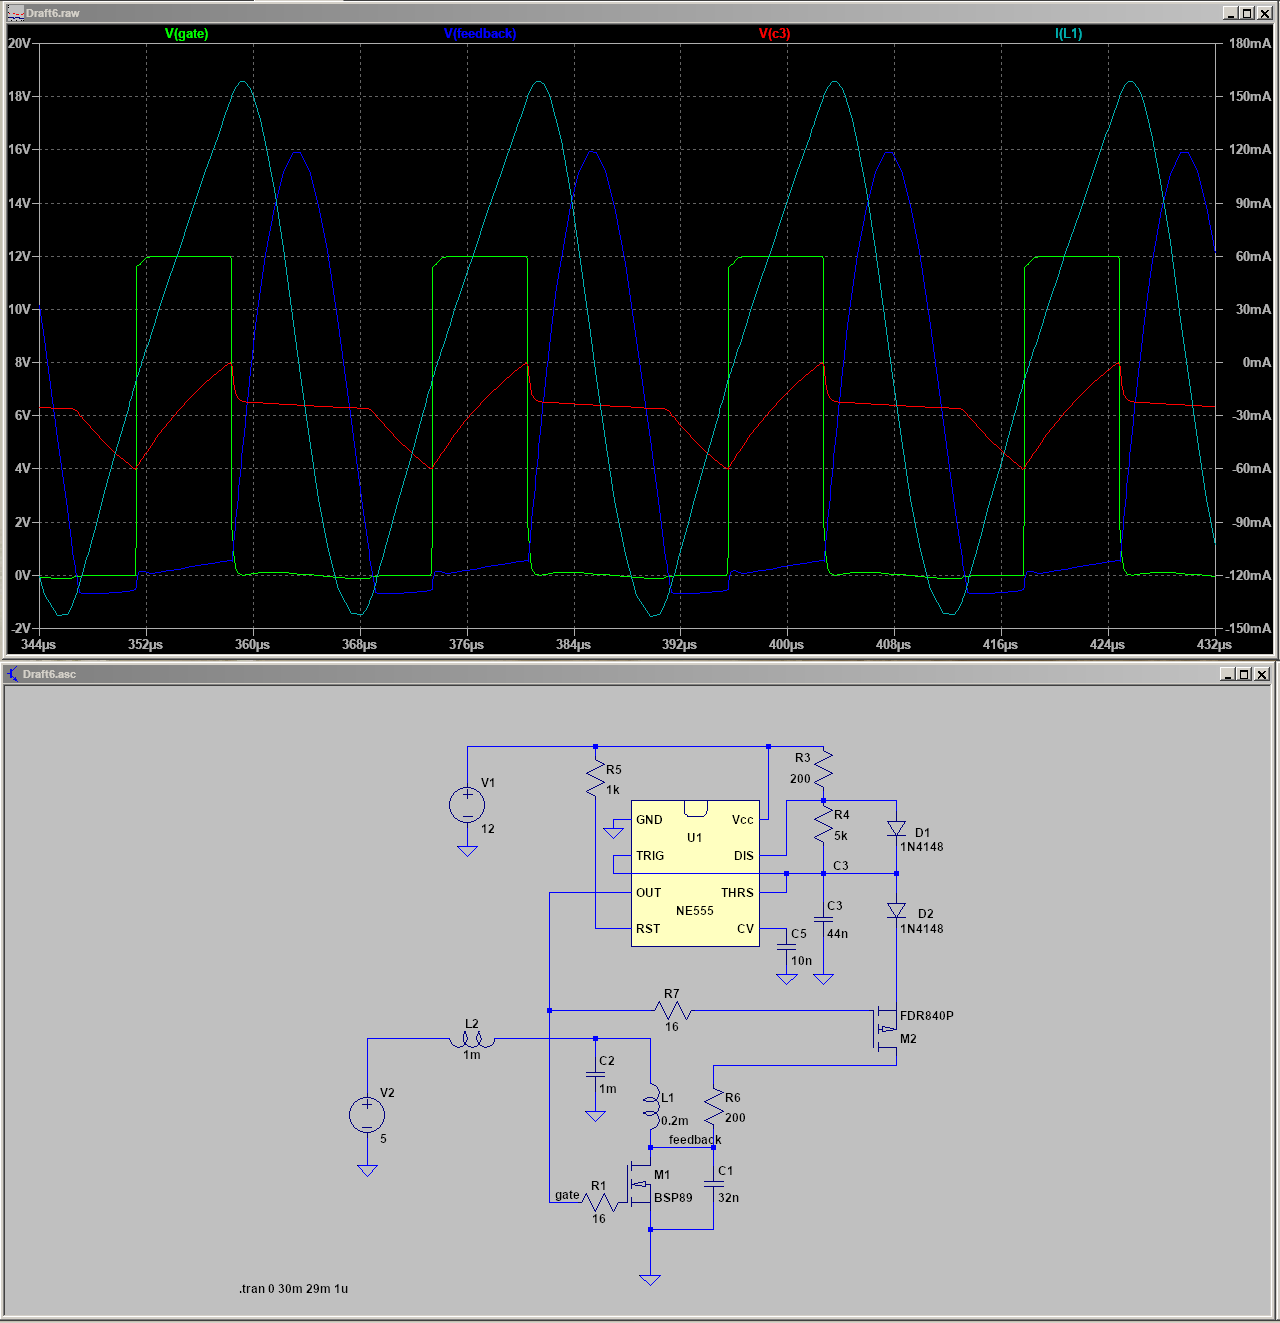
M1, L1, C1 forms the class E power stage. The basic idea for the quasi ZVS is that when L1 and C1 resonates such that V(feedback) falls below 0V it rapidly discharges C3 which triggers the 555 to switch on. M2 in needed to prevent C3 from being discharged while M1 is switched on. This allows both duty cycle control as well as switching only when there is minimal voltage across M1.
Tube mounting
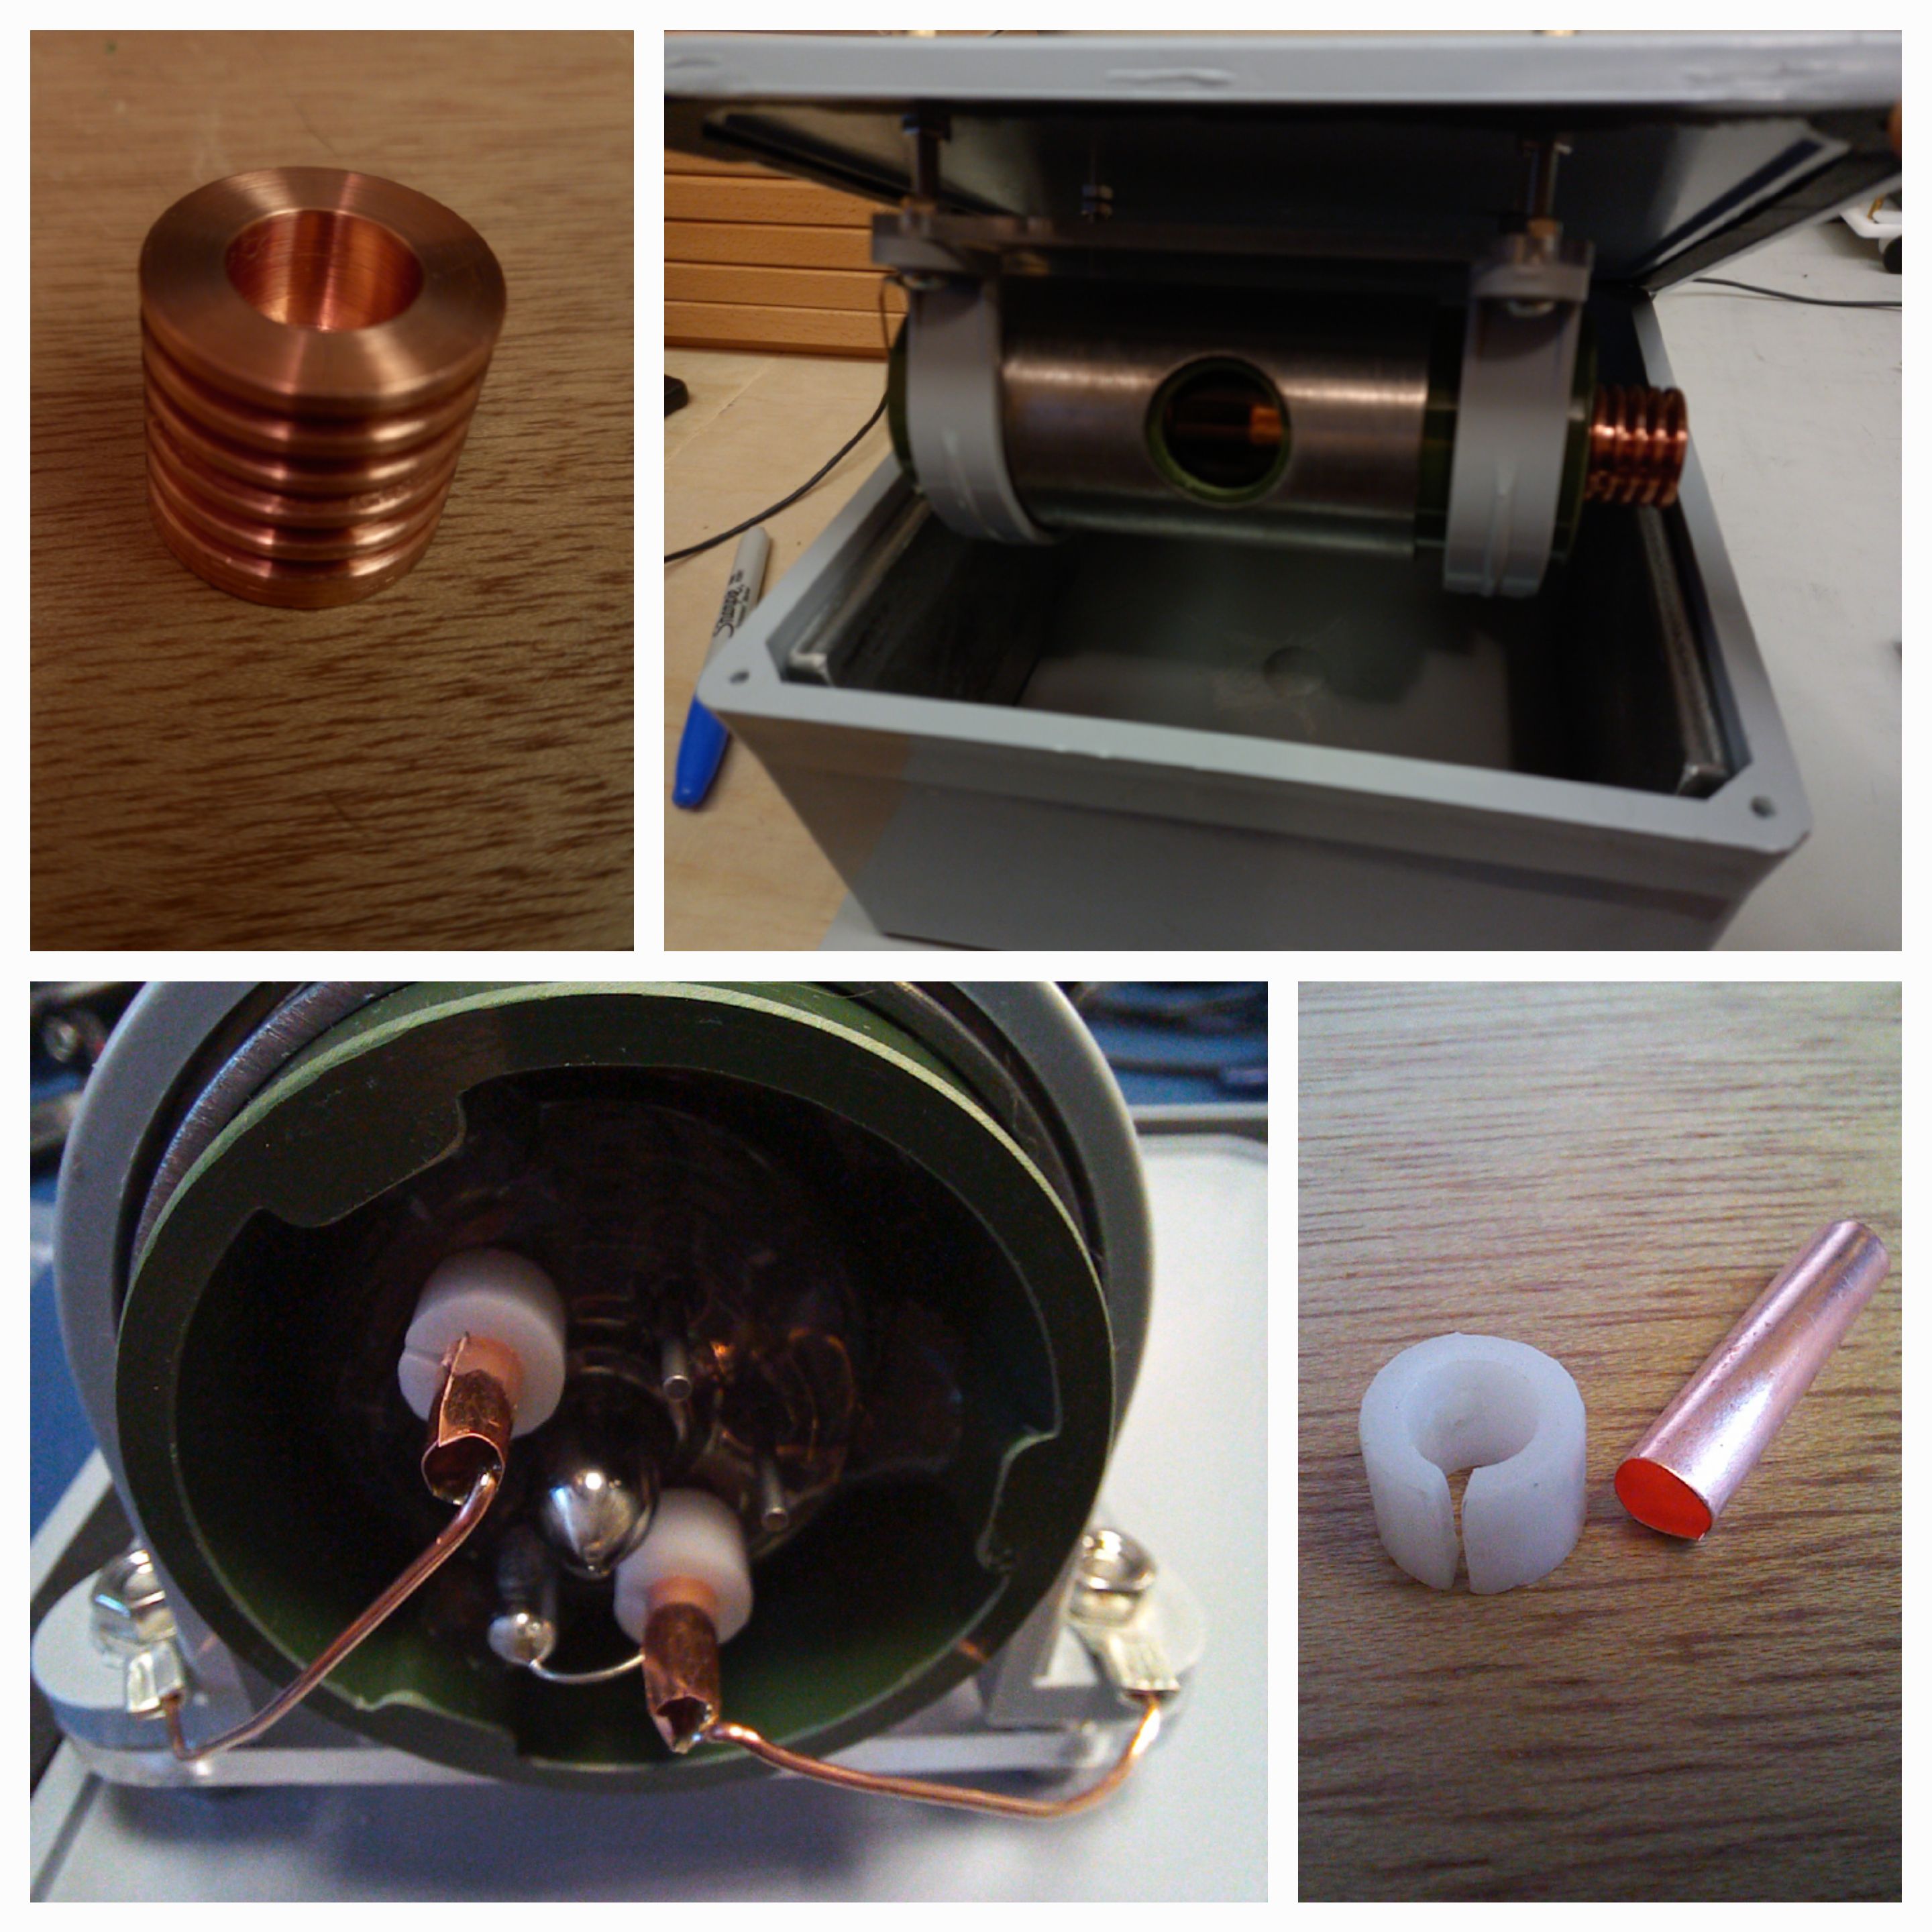
To connect to the x-ray tube, I used copper sheet with a laser cut C clamp that is a little undersized to connect to the filament terminals. On the anode side, there is a large copper stem that I attached a copper heatsink I turned up. The whole thing will be submerged in mineral oil so there doesn't need to be as much surface aread to conduct away the heat required.
Debayer
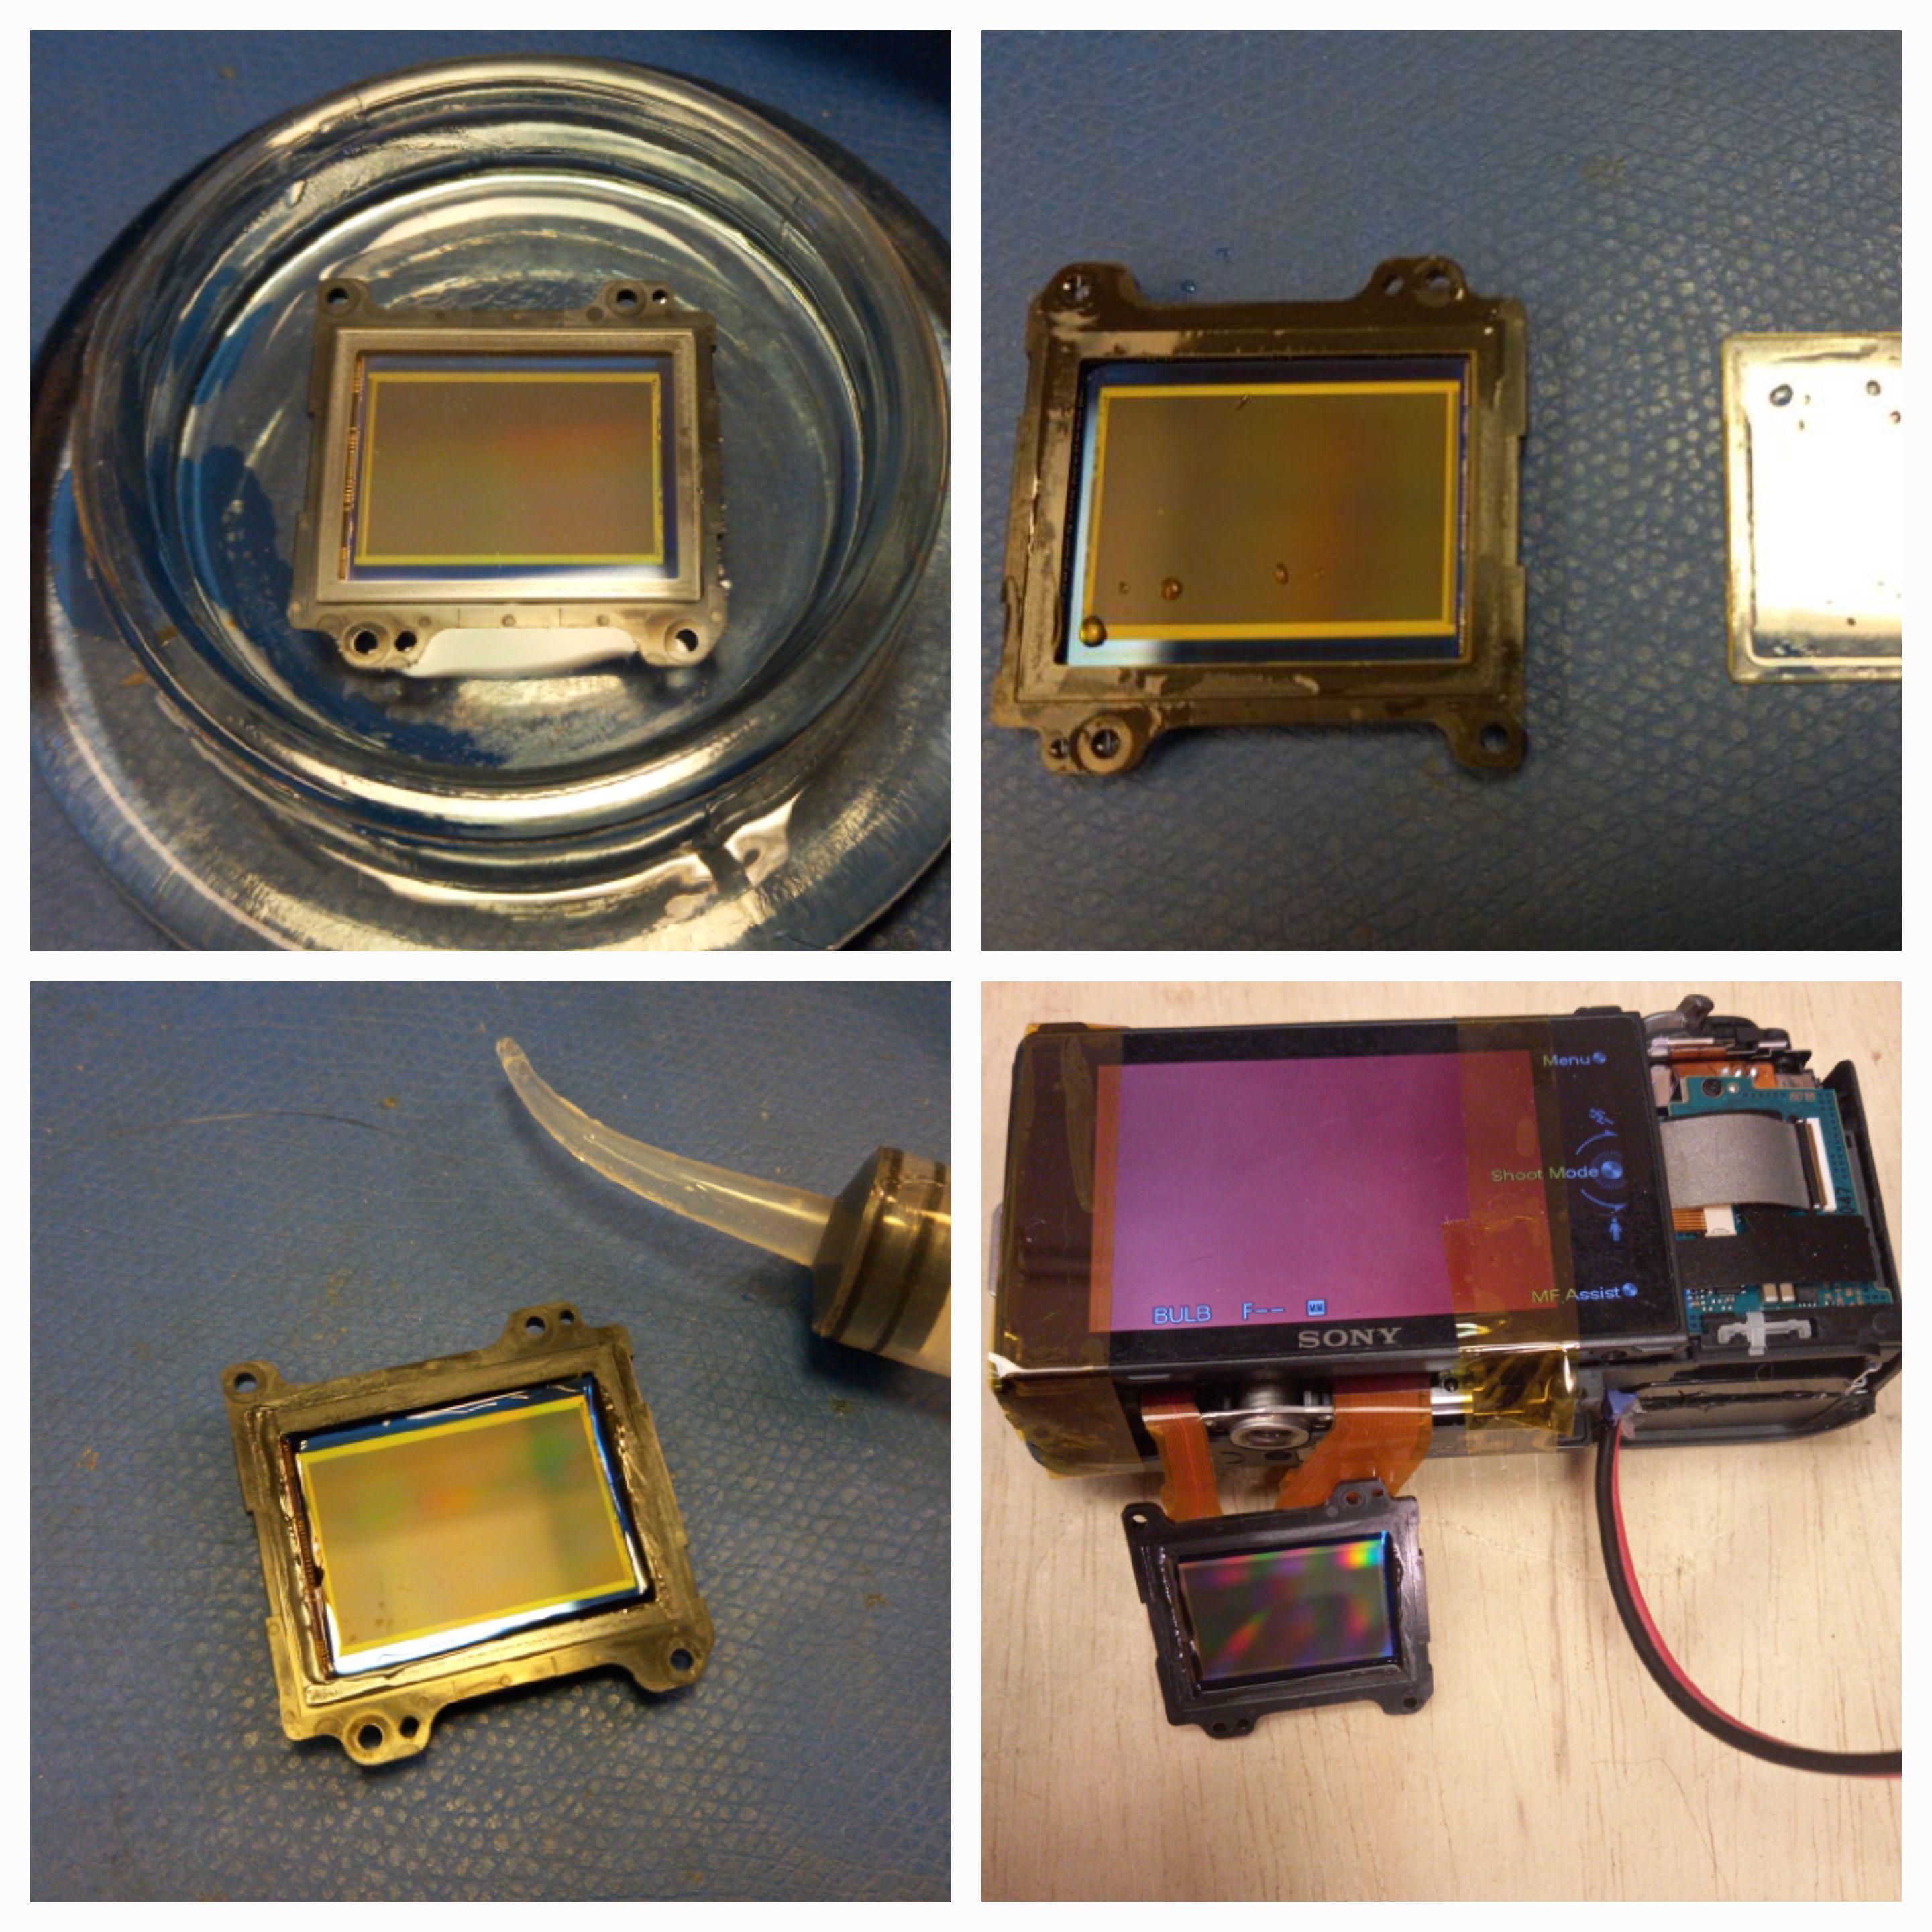
I wanted a debayered camera for imaging so I picked up a few old mirror less cameras and went about developing a process to consitently remove the bayer filter without damaging the sensor.
The first obstacle was removing the protective glass. This looks to be hermetically sealed with some epoxy. The best way I found to remove it was to submerse the sensor in a bath of water such that the water is on the level of the bottom of the glass. Then slowly heat the glass with a mini butane torch. At some point the expoy will release and when that happens I poke at it a little and it usually results in the glass just popping off.
Then I flush out all the water with a few washes in IPA and then a quick dry with a heatgun.
The next step was to protect the bond wires. I did this one side at a time with some UV resin in a syringe. Gravity and a steady hand is your friend here.
At this point the sensor is pretty hardy and I plug it back in the camera to perform a test before the slow and tedious task of removing the bayer filters start.
To remove the filters, I when with a very gentle approach. I have found that headlight polish to have the right grit and harness to remove everything. The main thing to note is that the cotton bud used to rub the polish on the sensor needs to be regularly swapped out. This is because I noticed that the main source of scratches was actually from larger pieces of the filter clinging to the cotton bud. At this point it is all about slow and steady progress.
Processing
After collecting a bunch of images of the subject rotating, it was projected into voxels making the assumtion that the xray source is a point. There was a little calibation done with a wire cube to estimate the projection parameters.